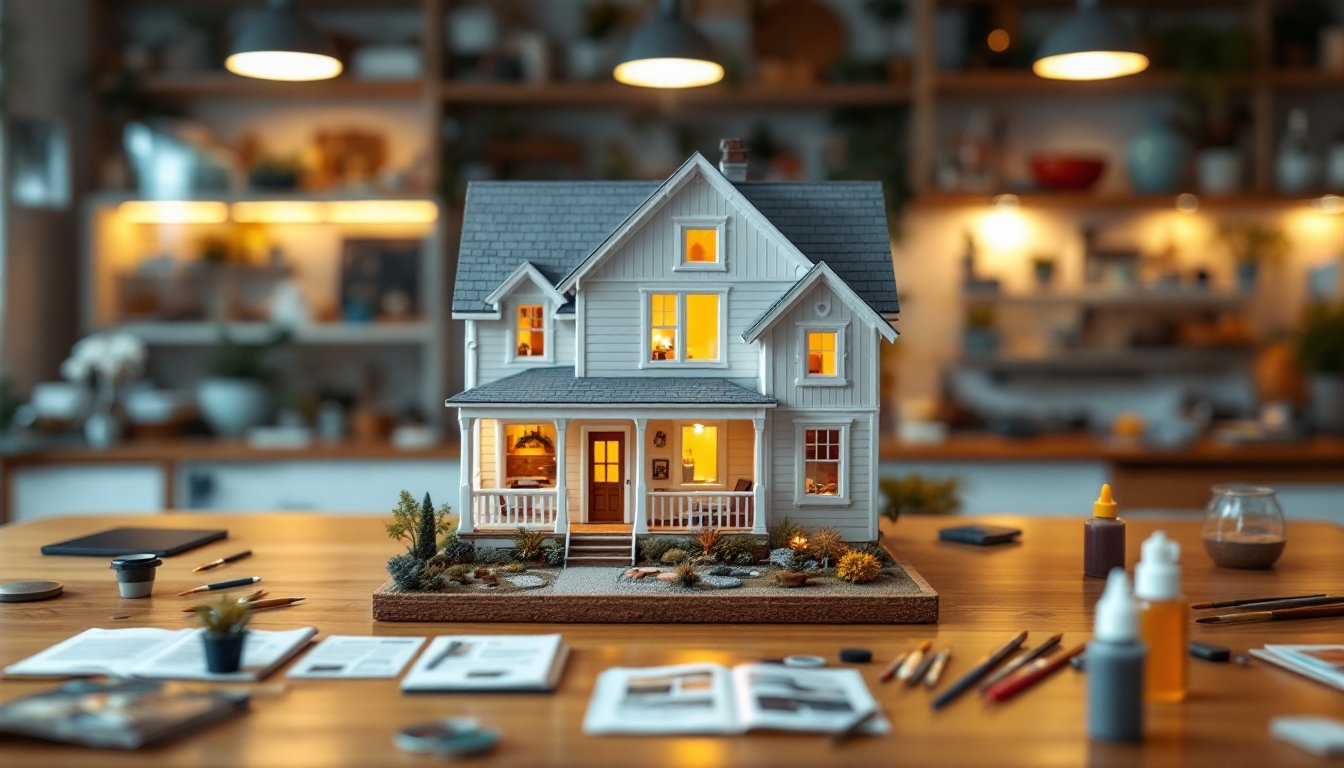
Building a tiny house isn’t a shortcut to affordable housing, it’s a deliberate choice that demands respect for zoning laws, structural integrity, and honest planning. Whether you’re motivated by reducing costs, downsizing, or exploring an alternative lifestyle, a DIY tiny house build requires the same rigor as any construction project. This guide walks you through the legal landscape, design fundamentals, material selection, budgeting, and hands-on construction. You’ll learn what professionals do, where you can save money without cutting corners, and when to call in licensed help.
Table of Contents
ToggleKey Takeaways
- Building your own tiny house requires understanding zoning laws, permits, and building codes before construction—electrical, plumbing, and foundation work must meet code or risk failed inspections and safety hazards.
- Choose your foundation type (concrete slab, FPSF, or pier-and-beam) wisely, as it affects cost, legality, utility access, and resale potential.
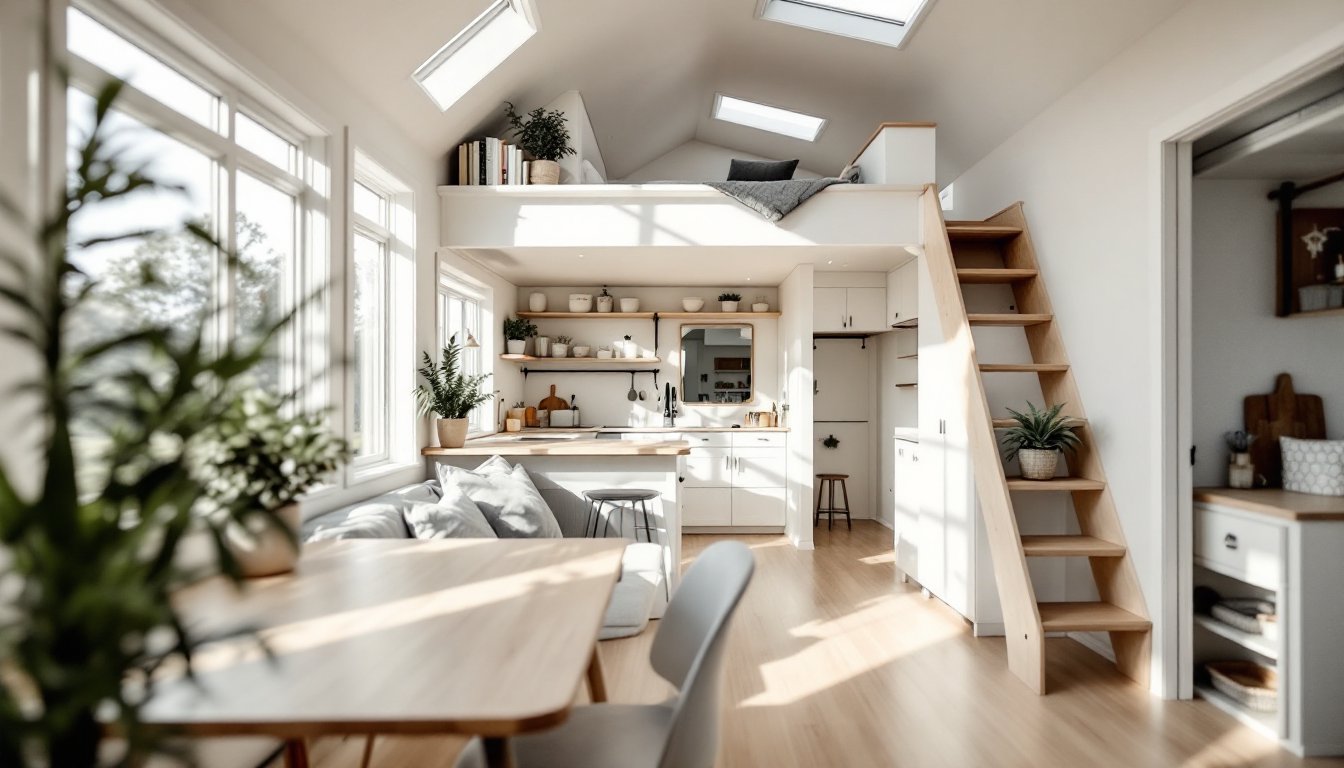
- Smart design is essential—most owner-built tiny houses range from 200 to 400 square feet, with every square foot serving multiple purposes to maximize livability.
- A DIY tiny house costs $30,000–$60,000 in materials (excluding owner labor), with savings available through reclaimed materials and contractor-grade finishes, but don’t cut corners on structural integrity, electrical, plumbing, or roofing.
- Hire licensed professionals for electrical rough-in, plumbing, and final inspections to ensure code compliance and safety, then handle framing, drywall, painting, and finish work yourself to reduce labor costs.
- Plan for 4–6 months part-time or 2–3 months full-time to complete your build, accounting for permit delays and inspections at each phase.
Understanding Tiny House Fundamentals and Legal Requirements
A tiny house is generally defined as a single-family dwelling under 400 square feet, though definitions vary widely by jurisdiction. Before hammering a single nail, you need to understand that tiny houses exist in a gray zone in most municipalities. Traditional zoning assumes single-family homes sit on fixed foundations in residential zones: a tiny house might be mobile, temporary, or on a lot too small for conventional codes.
Zoning Laws and Permits You Need to Know
Zoning regulations are your first hurdle, and they differ dramatically by county, city, and even neighborhood. Some jurisdictions welcome tiny houses and have updated codes: others treat them as non-conforming structures. You’ll need to:
- Check local zoning ordinances for minimum lot sizes, setbacks, and dwelling unit definitions. Call your city planning department or search their website.
- Determine if your build requires permits. Structural work almost always does: cosmetic work may not. Permits exist to ensure electrical, plumbing, and framing meet the International Building Code (IBC) and International Residential Code (IRC).
- Ask about mobile vs. permanent structures. A tiny house on a trailer may fall under different rules than one on a concrete foundation.
- Budget for inspections. Even in favorable jurisdictions, you’ll pay for foundation, framing, electrical, plumbing, and final inspections.
- Understand HOA restrictions. If your land is in a homeowners association, tiny houses may be prohibited outright.
Building codes exist because they save lives. Electrical work must follow the National Electrical Code (NEC): plumbing must prevent backflow and contamination. If you’re unfamiliar with code compliance, hire a licensed electrician and plumber rather than risk a failed inspection or worse, a fire or contamination issue that injures someone.
Planning Your Tiny House Design and Layout
Smart design is what separates a livable tiny house from a cramped storage unit. Every square foot serves multiple purposes, and every decision cascades through the build.
Start with a realistic footprint. Most owner-built tiny houses range from 200 to 400 square feet. Anything smaller than 200 becomes genuinely difficult to live in long-term: anything larger creeps toward a small cottage and loses the cost advantage. Sketch out your layout on paper or use free design tools. Account for wall thickness (typically 6 inches with 2×4 studs, insulation, and sheathing), and don’t forget that kitchen cabinets, stairs, and appliances consume floor space fast.
Choosing Foundation and Footprint Wisely
Your foundation choice affects cost, timeline, legality, and resale potential. Mobile tiny houses sit on a steel trailer frame and are registered like an RV. They cost less upfront but may be harder to insure, refinance, or place on rented land. A permanent foundation, concrete slab, frost-protected shallow foundation (FPSF), or pier-and-beam, ties your house to the land and signals permanence to zoning officials and lenders.
For a 300-square-foot house on a permanent foundation:
- Concrete slab: ~$3–5 per square foot (regional variation). Requires site preparation, gravel base, and rebar or wire mesh. Best for flat, well-draining sites.
- FPSF (frost-protected shallow): Codes in cold climates often require frost depth protection (e.g., 48 inches in Minnesota). This costs more but avoids deep excavation.
- Pier-and-beam: Allows crawl space and easier utility access. Costs ~$4–7 per square foot depending on soil conditions.
The foundation type also influences how you’ll run utilities. Slab pours require conduit and sleeves for electrical and plumbing: pier-and-beam homes have easier access from below. Discuss foundation design with a structural engineer or your local building department, a $500 consultation saves costly mistakes.
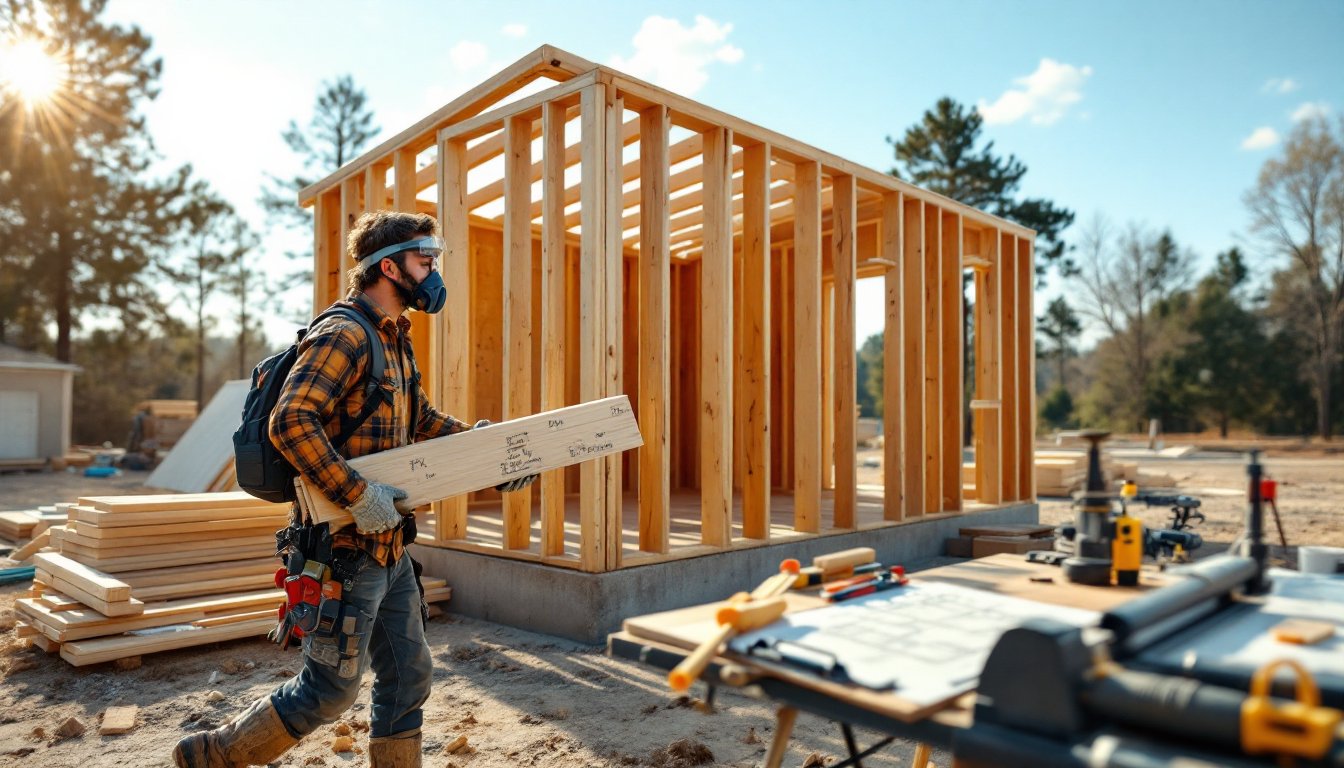
Essential Materials and Tools for Your Build
A 300-square-foot tiny house needs the same structural quality as a full-size home, just less of everything. Here’s what you’ll need:
Structural framing:
- Dimensional lumber (2×4 wall studs, 2×8 or 2×10 floor joists, 2×6 roof rafters). Nominal 2×4 lumber is actually 1.5″ × 3.5″ in cross-section: know this when calculating load capacity.
- Plywood or OSB sheathing, CDX grade for exterior (exterior-grade glue and sanded surface).
- Roof sheathing and underlayment (roofing felt or ice-and-water shield, depending on climate).
Exterior weatherproofing:
- House wrap (Tyvek or Typar) to prevent air leaks and manage moisture.
- Exterior cladding: shingles, metal panels, or board-and-batten. Material choice affects both cost and durability.
- Windows and a solid exterior door rated for your climate zone.
Interior:
- Drywall or alternatives like reclaimed wood siding for walls.
- Insulation (fiberglass batts, spray foam, or mineral wool). Cold climates need R-20 walls and R-40 roofs: mild climates can use less.
- Flooring underlayment and finish (plywood subfloor, then laminate, vinyl, or hardwood).
Mechanical:
- Electrical: Romex cable (14/2 or 12/2 gauge depending on circuit), boxes, breakers, and wire per NEC standards. Don’t guess here, hire a licensed electrician for rough-in and final connections.
- Plumbing: PVC or PEX supply lines, DWV (drain-waste-vent) pipe, fixtures. Again, code is strict: hire a pro if uncertain.
- HVAC: A heat pump, mini-split system, or small forced-air unit keeps a tiny space comfortable.
Essential tools (assuming you own basic hand tools):
- Miter saw (cleaner crosscuts than a circular saw, especially for trim).
- Circular saw or table saw for ripping lumber.
- Power drill, reciprocating saw, nail gun (pneumatic or battery).
- Levels, tape measures, speed square, stud finder.
- Respirator or N95 masks (sawdust and fiberglass are health hazards).
- Safety glasses, work gloves, and hearing protection (circular saws exceed 100 dB).
Many DIYers rent specialized tools (scaffolding, nail guns, compressors) rather than buy. Rental typically costs $20–60 per day, often cheaper than ownership if you’re a one-time builder.
Managing Budget and Cost-Effective Solutions
A DIY tiny house can cost $30,000–$60,000 to build (owner labor excluded): commercial builders charge $60,000–$120,000+ because labor is their largest expense. Your actual cost depends on location, finishes, foundation type, and whether you’re cutting corners on safety.
Where to save without sacrificing:
- Materials: Buy dimensional lumber during sales. Reclaimed wood, pallet projects, and salvaged fixtures add character and cost less. Just inspect carefully for structural soundness.
- Finishes: High-end appliances and custom cabinetry blow budgets. Standard contractor-grade fixtures work fine: paint and lighting transform spaces cheaply.
- Labor-intensive tasks: Handle framing, drywall, painting, and finish work yourself if skilled. Outsource electrical, plumbing, and foundation work to licensed professionals.
- Seasonal timing: Building in winter costs less (material discounts, contractor availability) but requires heated workspace. Spring/summer is faster but pricier.
Where not to cut corners:
- Structural lumber and fasteners must meet code.
- Electrical and plumbing require permits and inspection: DIY work here can fail inspection or worse.
- Insulation and air sealing protect energy efficiency and durability.
- Roof and foundation are expensive to repair: get them right the first time.
Create a detailed material takeoff (a line-by-line list of every board, box of nails, and gallon of paint) and get quotes from multiple suppliers. Regional variation is huge, lumber costs in rural Montana differ from Seattle or Atlanta.
Step-by-Step Construction Process for DIY Builders
A streamlined build follows this sequence:
Phase 1: Site prep and foundation (weeks 1–4)
- Clear and level the site. Compact soil or prepare a gravel base.
- Lay out the foundation using batter boards and string (ensures square corners and correct dimensions).
- Pour the foundation (slab, FPSF, or piers). This typically requires a concrete contractor or help from experienced friends.
- Let cure per specifications (usually 28 days for full strength, but you can build after 7 days on a slab if needed).
Phase 2: Framing (weeks 5–8)
- Build and raise wall frames on the foundation. Use 2×4 studs 16 inches on center (standard spacing). Brace walls diagonally with 1×4 lumber until roof sheathing stiffens the structure.
- Install floor joists if on piers or crawl space. Space 16″ on center for typical loads.
- Frame the roof. Rafters or trusses? Trusses are faster and require no interior bracing: rafters give more attic space and are easier to custom-fit.
- Sheath exterior walls with CDX plywood, then apply house wrap and start rough framing openings for windows and doors.
Use interior designers’ guidance when planning layouts: reference sites like Ana White for furniture plans that maximize tiny spaces.
Phase 3: Utilities (weeks 9–11)
- Electrical rough-in: Install conduit, boxes, and wiring per NEC. Have a licensed electrician inspect before walls close.
- Plumbing rough-in: Run supply and DWV lines. Slope DWV lines 1/4 inch per foot for gravity drainage. Again, hire a pro for inspection.
- HVAC installation: Size your system for the square footage. A heat pump is efficient: mini-splits are increasingly popular.
Phase 4: Insulation and drywall (weeks 12–14)
- Install insulation in walls, floor, and ceiling. Typical: R-15 walls, R-30 floor, R-40 roof (varies by climate).
- Install vapor barriers if required by code and climate (consult your local building department).
- Hang drywall and tape/joint compound.
Phase 5: Finishes (weeks 15–18)
- Paint walls and ceilings.
- Install flooring underlayment and finish (vinyl, laminate, hardwood).
- Install interior doors, trim, and cabinetry.
- Final electrical and plumbing connections (with licensed inspections).
- Final inspection by building department.
Resource sites like Fix This Build That offer workshop guidance and tool reviews to streamline your process. For energy-smart design, reference Fine Homebuilding’s tiny-house basics for real-world examples.
A 300-square-foot owner-built tiny house typically takes 4–6 months part-time, or 2–3 months full-time with a small team. Budget extra time for inspections and permit delays, they happen.